


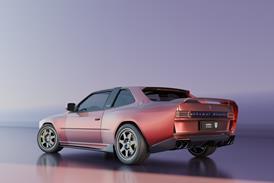


This Autodesk Showcase manual, presented by the Majenta Academy, is a step by step-by-step guide that will show you how to create impressive presentations by way of high quality visuals and animations. The steps below will teach you how to import a model, place it in different environments, assign and edit the materials, generate shadows, create alternatives and export high resolution images and animations. The model of a Bentley Continental GT, courtesy of Bentley Motors, has been used as an example so you can view each step as it develops.

After the model is imported, it will have an empty background. Press ‘E' to bring up a selection of environments. Selecting an environment from the library will bring it up to the selected portion. You can then click on it again to apply it to the scene.
While setting up the model, it makes sense to use a simple and clear background like ‘Photo Studio' as shown below. This will make it easier to view the surfaces during the preparation process.

After applying the environment you will notice that the model goes through the floor. The floor can be moved to the correct position by going to Scenes > Set Floor Position.
In the Set Floor Position window, click 'Move to Bottom of Model'.
This will shift the floor to the correct position.
You also have the option to precisely adjust the floor position by moving it higher or lower.
Moving the floor larger distances can be done by dragging the bar, and smaller/precise adjustments can be made by using the numerical window.

Select the entire geometry and go to Scene > Create Ambient Shadows to apply Ambient Occlusion.
Once Ambient Occlusion is applied, it is good to check whether the shadows have been applied properly, and check any inconsistencies. Go to Scene > Show Ambient Shadows Only.
Show Ambient Shadows will display the entire model in matt white color only, with the soft shadows that have been applied. If there are any problems, you can select individual parts and apply Ambient Occlusion to them again.
Applying Ambient Occlusion is an extremely important part of the preparation process. This is a key factor that will affect the final output of your model, which means it is an absolute MUST if you want to achieve a high quality presentation.

Perspective for the model can be adjusted depending on how dynamic you want it to look. This is done by altering the focal length of the camera lens. Go to View > Adjust Perspective.
The wider the angle of the lens, the more extreme or ‘fish-eyed' the perspective will appear.
Note : It is also possible to adjust tilt from View > Adjust Tilt.

Assigning materials is very simple: just select the part, or surface you want to assign the material to, then click on the material of your choice and it will be assigned.
It is possible to make a combined selection of objects with the same material. Select an object, right click on it, and you will see the menu shown below. Now click on ‘All objects with this material'.
Continues →